
A Soldier’s Guide to the Maps of Battlefield V: Holland and North Africa
We’re starting our world tour of the eight maps available in Battlefield V at launch with a detailed look at the first four. From close-quarters urban warfare to expansive vehicle-focused combat, the maps set in Holland (Rotterdam and Devastation) and North Africa (Hamada and Aerodrome) offer players a wide range of experiences. Make sure your passport’s up to date, then get ready to start your tour of some of the unseen battlefields of WWII you’ll be facing by getting some advanced intel below before you jump into battle.
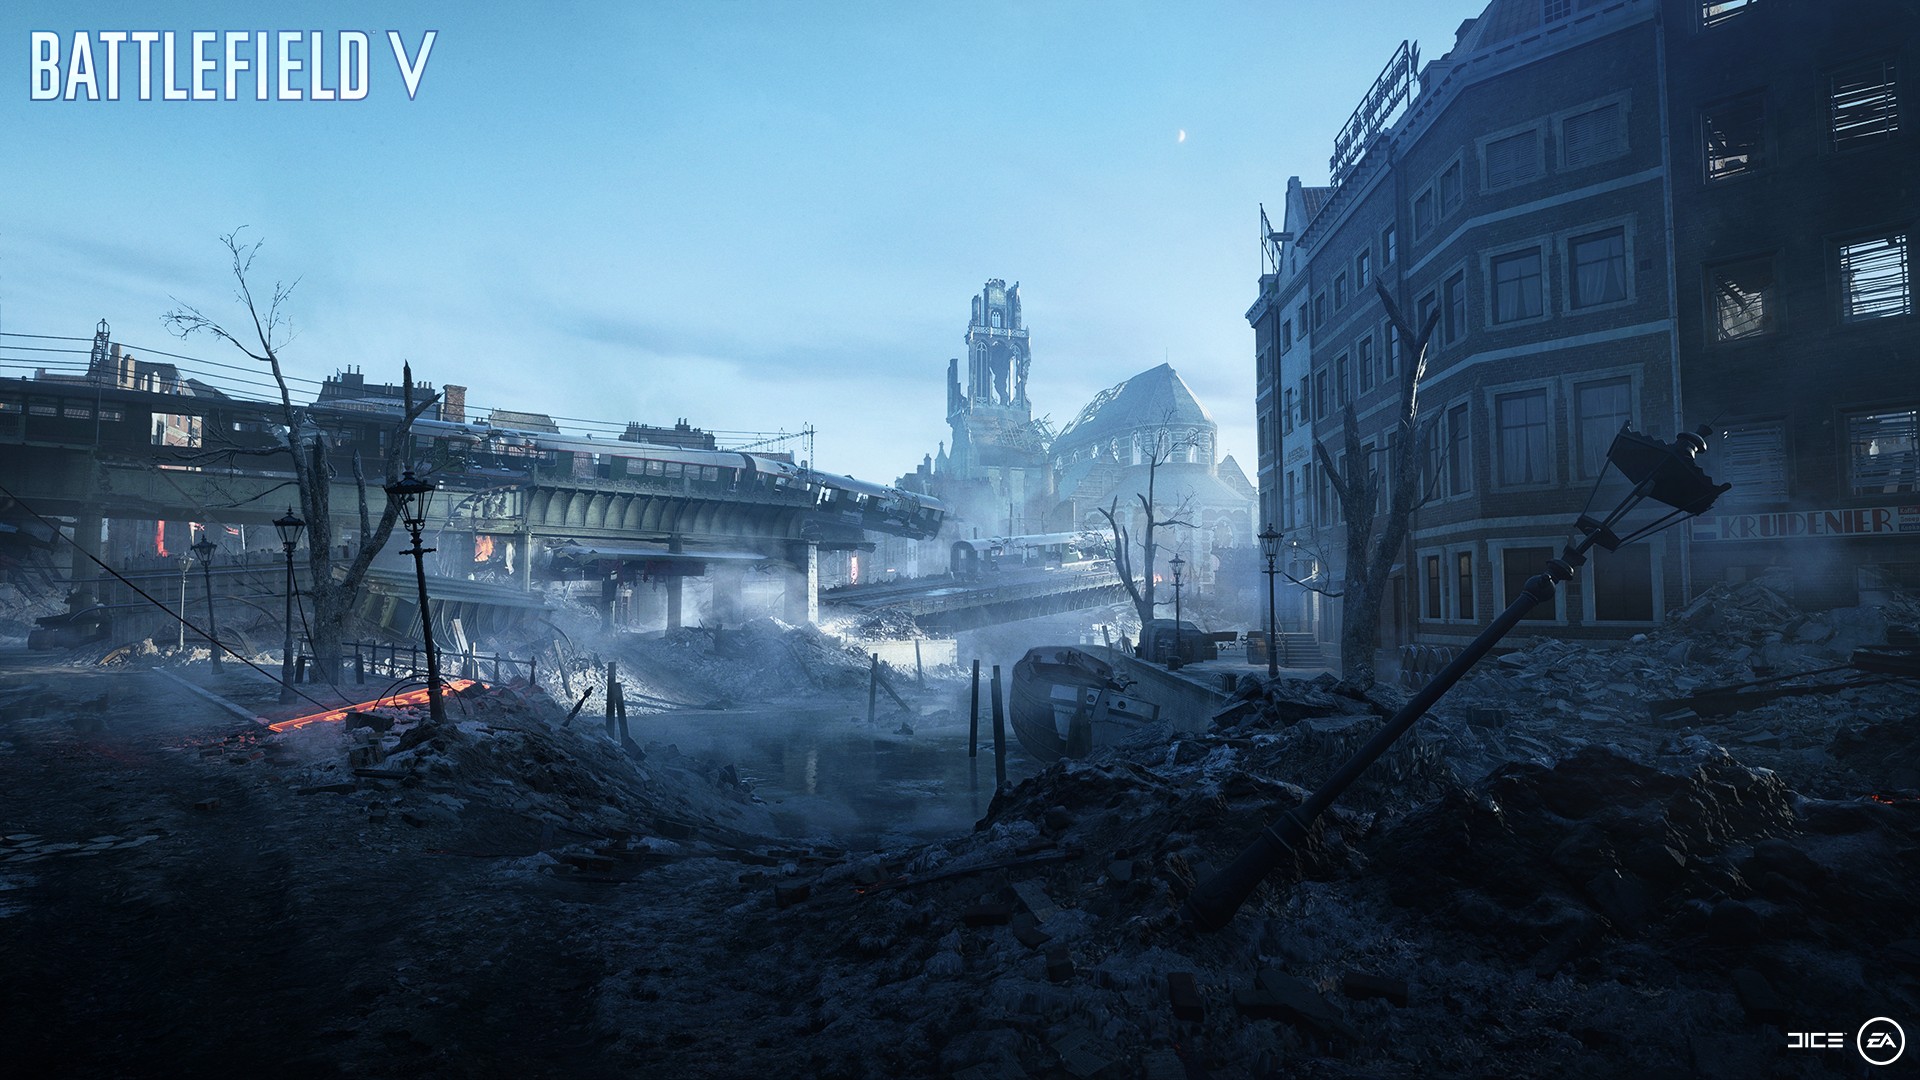
Welcome to Devastation
Our second Dutch map is Devastation, the charred remains of another section of Rotterdam that’s already fallen to Axis bombardment. You won’t need to look hard for cover, pieces of this formerly picturesque part of the city are scattered literally everywhere among the few still-standing structures. Of course, cover for you also means cover for your enemies so you’ll need to keep your wits about you to survive.
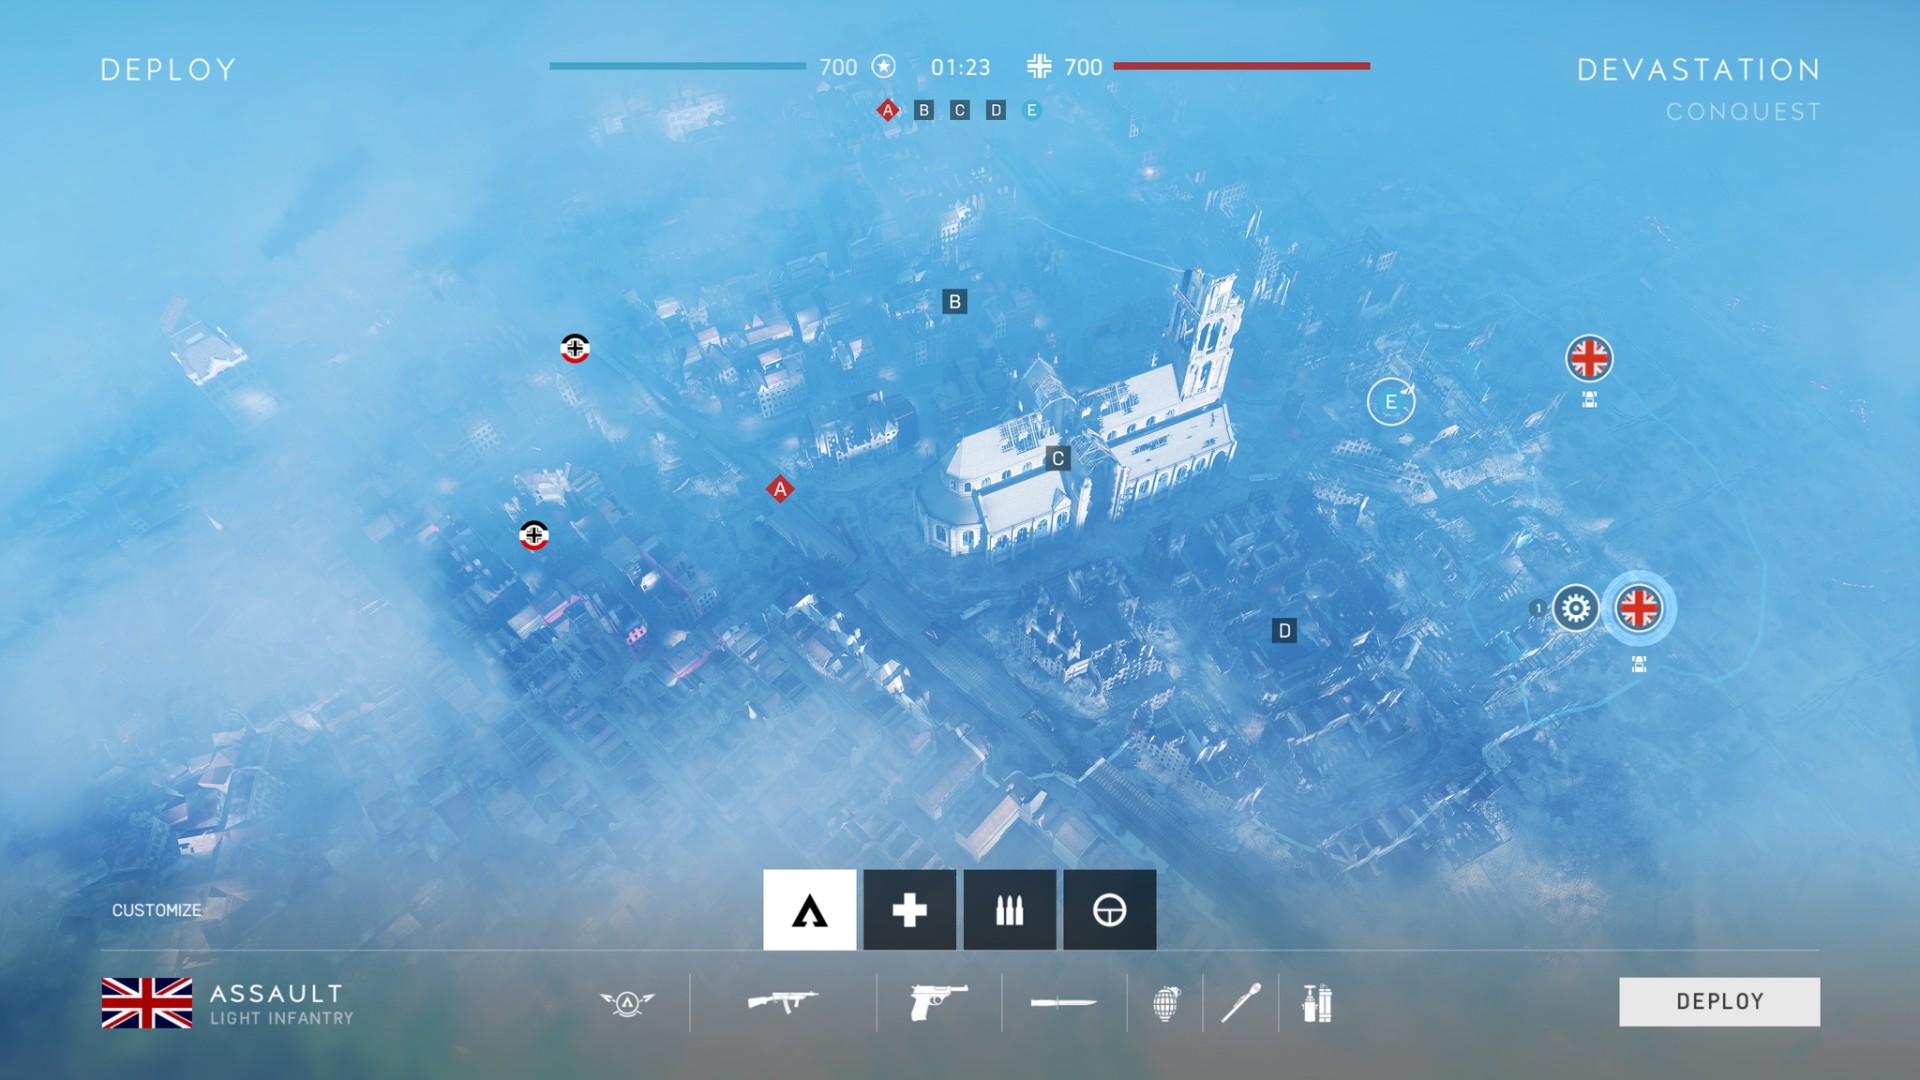
Five Capture Points
On this map, you’ll also need to capture five different points, each represented by a flag. Flag A can be found at the Train Wreck, where the overturned platforms make for great elevated positions and the perfect location to stage your attack on Flag C. Flag B is the Library, one of the still (mostly) standing structures in this area of the city. The three remaining floors make for great hiding and ambush positions.
The great looming Cathedral is Flag C and one of the most contentious areas on the entire map. Every other capture point can be reached from this central location so if you’re looking for a sure-fire fight, this is the place to find it. Flag D is located at the Cinema; just look for the neon lights to guide you to this former dream palace and attack point for both Flags A and C.
And finally, Flag E is the Old Mall. The only exchanges going on here now are whizzing bullets between soldiers, especially those holding overlooking positions in the Cathedral.
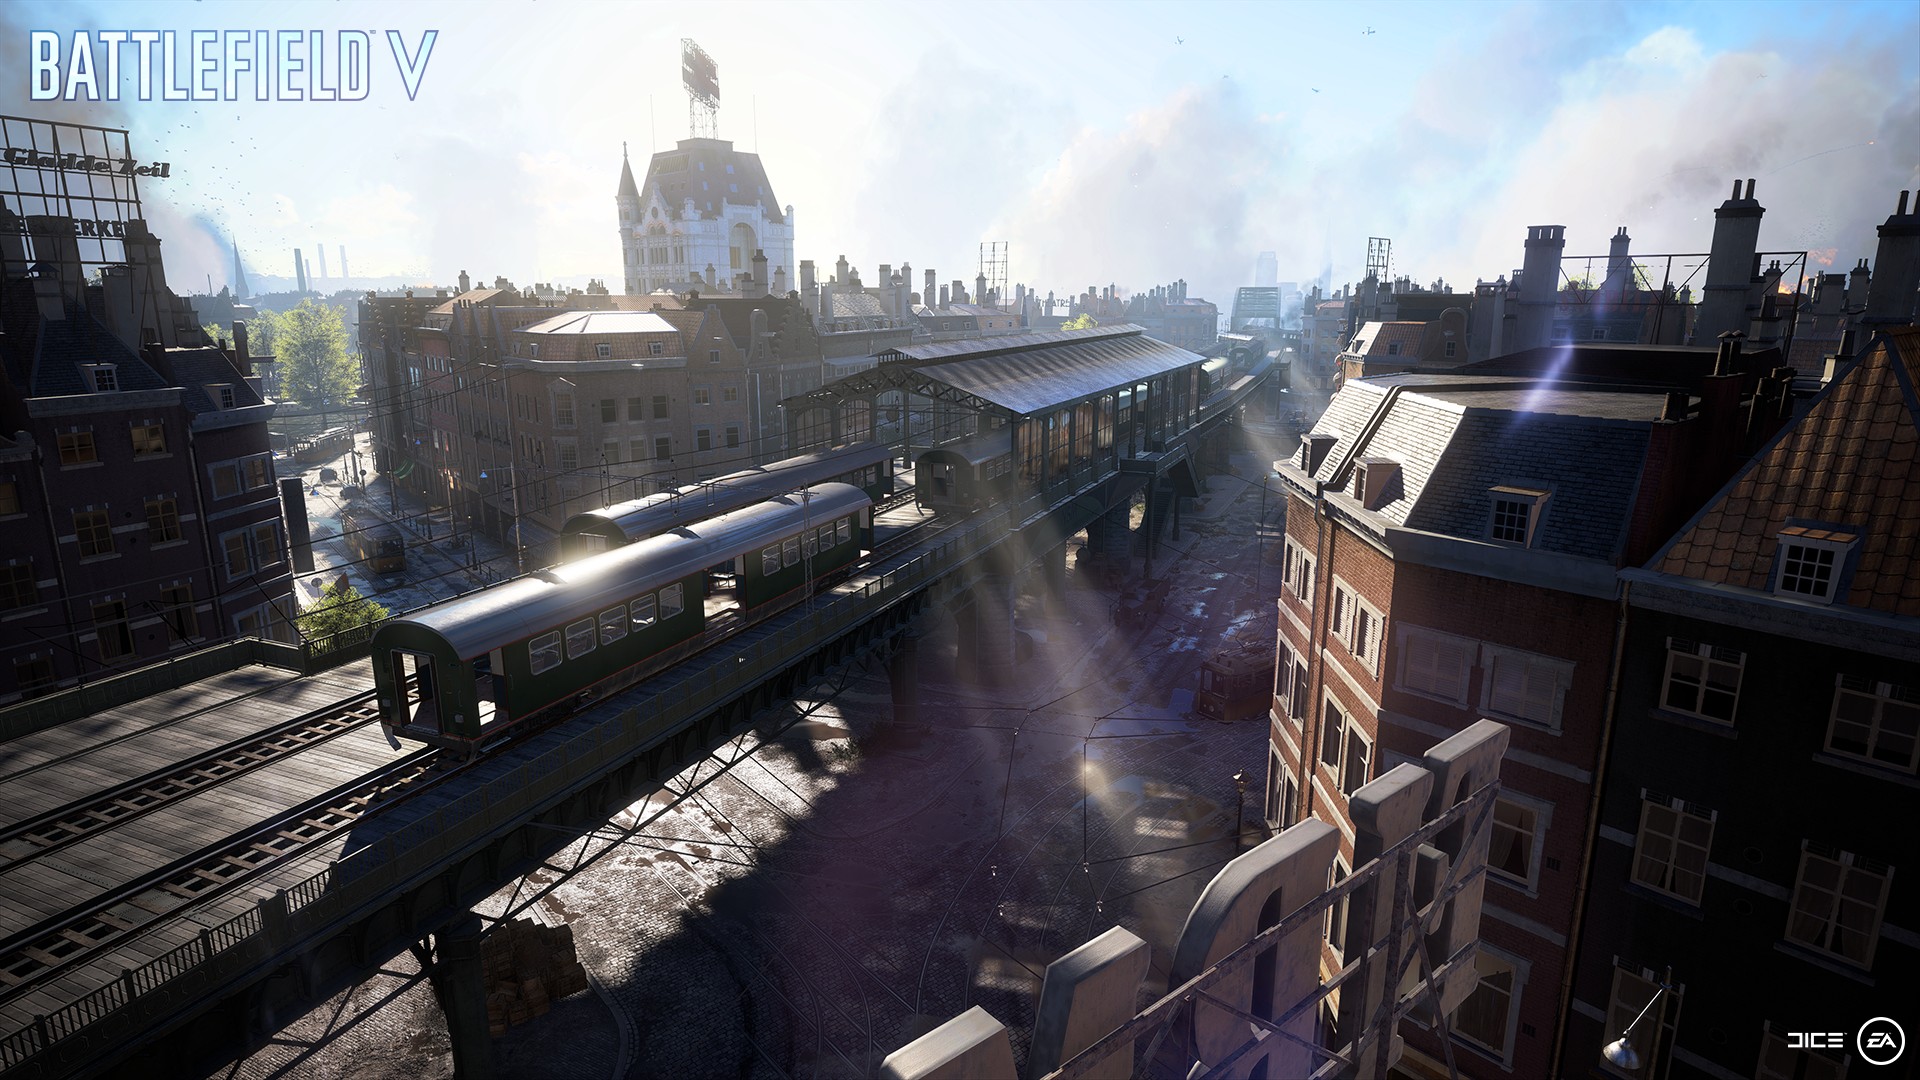
Welcome to Rotterdam
Let’s start in Holland, with the Rotterdam map. This once-charming port city has seen better days, and while most of the major buildings are still intact we wouldn’t recommend casually taking in the sites. Vehicles patrol the major thoroughfares looking for anyone unlucky or unwary enough to use the ample cover. And there are always eyes in the sky thanks to the elevated railway.
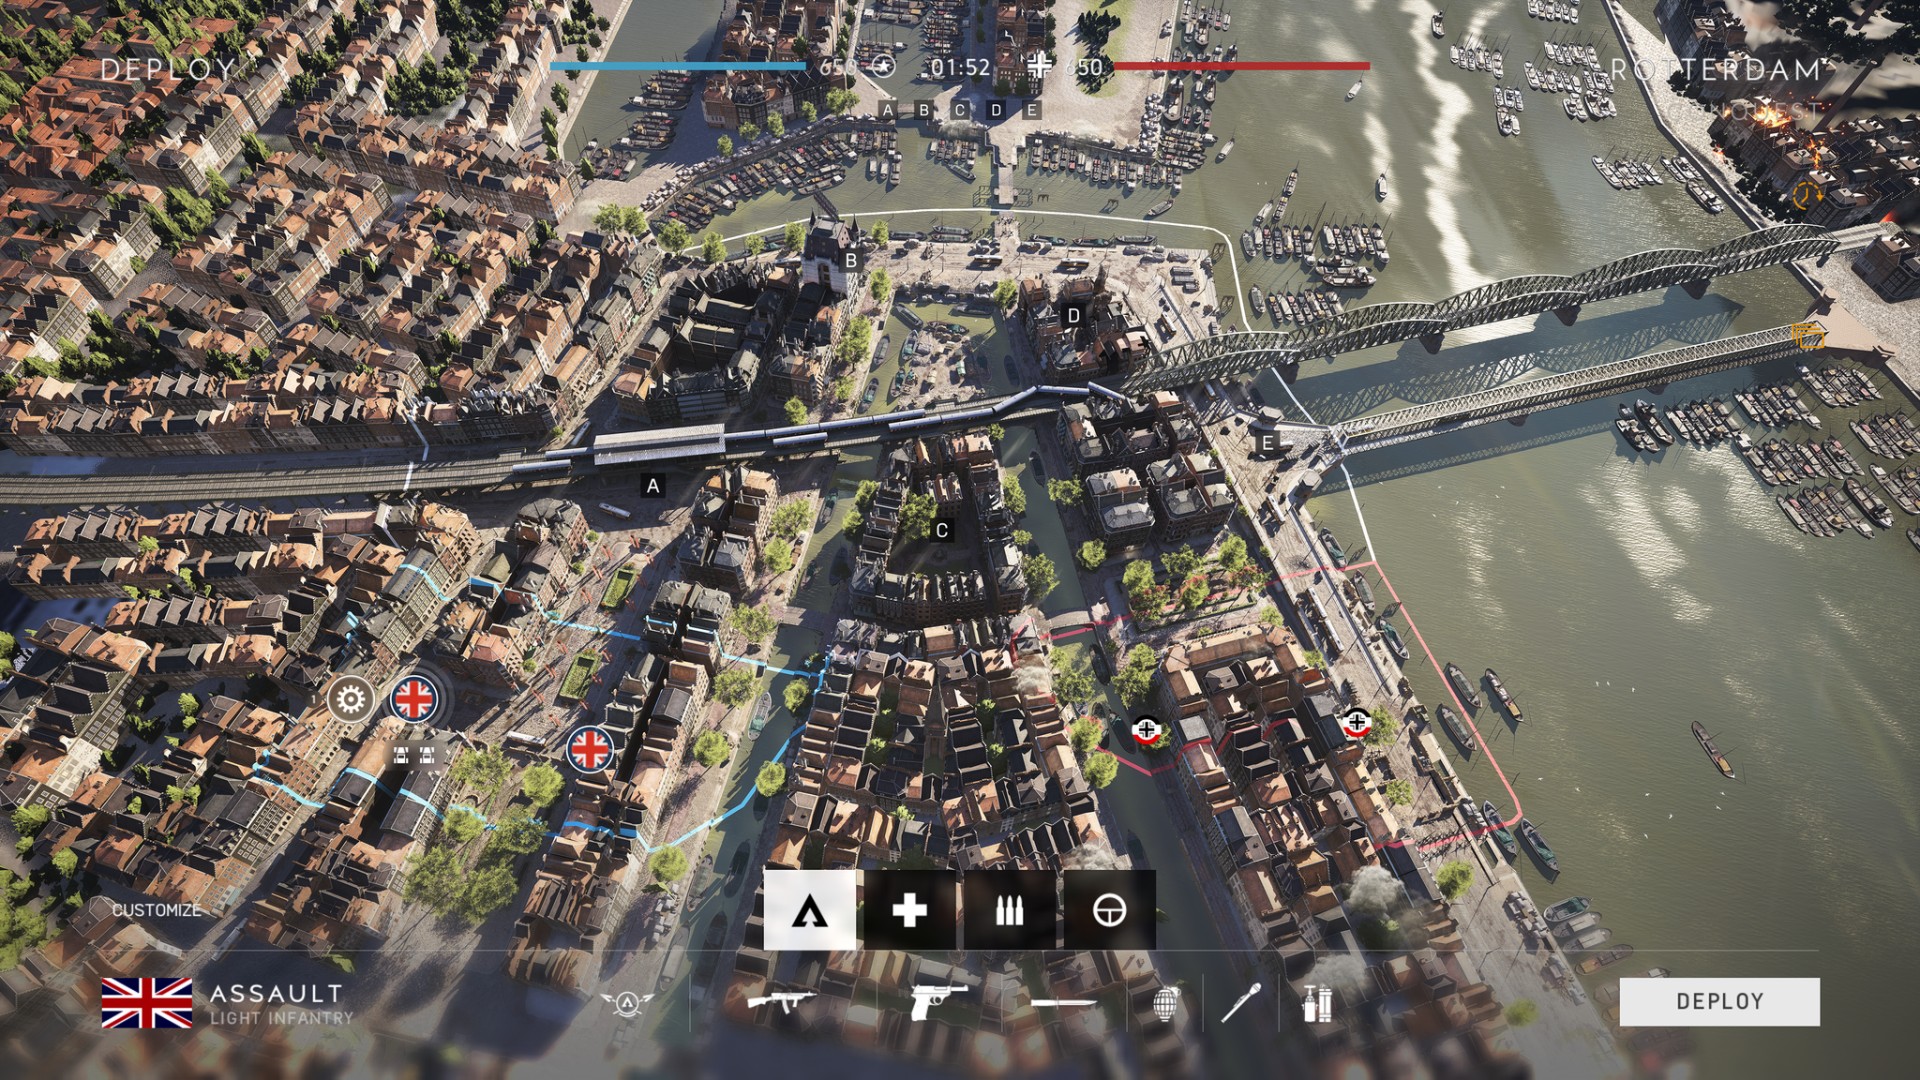
Five Capture Points
You’ll need to work with your team and squad to capture five different points on this map, all represented by flags. Flag A is the Train Station Beurs and consists of wide streets and little cover making this one of the more exposed flags. Send in your Support players to build Fortifications if you want to hold it. Flag B can be found at the White House, a fantastic central point to hold and a perfect spot to fend off attackers from Flag D. But make sure you post someone to cover the maze of alleys out back.
The Courtyard houses Flag C, where nearly every approach can be easily blocked by Fortifications, but it really only seems impenetrable and can leave defenders cornered with nowhere to go. The Ruins at Flag D show you one of the areas of Rotterdam that has already succumbed to the destructive power of two clashing armies. This mangled, rubble-filled space is also one of the smallest and trickiest capture points.
And finally, Flag E, the Willemsbridge, is a two-level capture point and also closest to where the Axis forces will be spawning, so skirmishes here are all but a given.
Welcome to Hamada
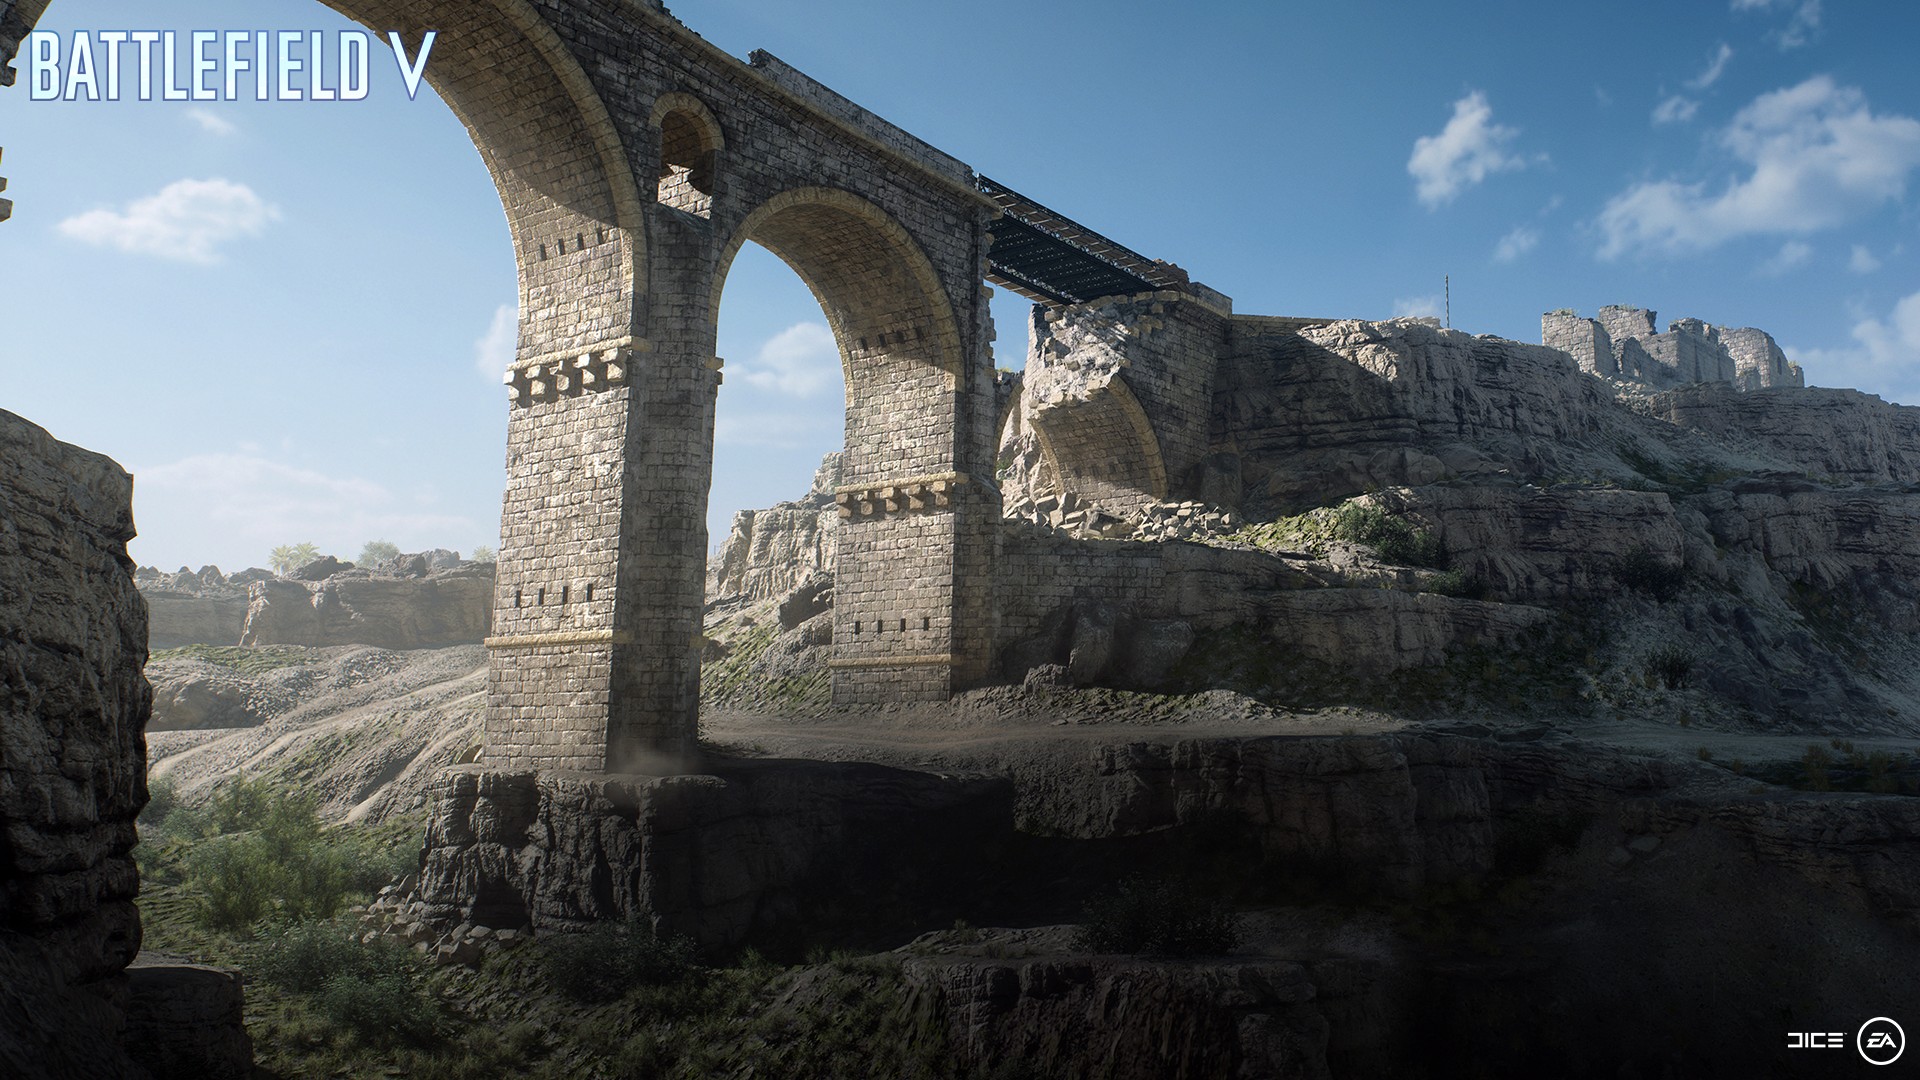
We’ll start this tour of North Africa in Hamada, one of the largest maps in Battlefield history. This desolate, sprawling landscape lies dotted with rubble, ancient ruins, and whatever sparse desert plants can manage to hold on. One of the few remaining man-made structures still standing is a massive bridge spanning a mostly dry ravine. Tanks prowl these wastes from below while fighters rumble through clear blue skies above. Death comes in many forms under the unforgiving desert sun of Hamada.
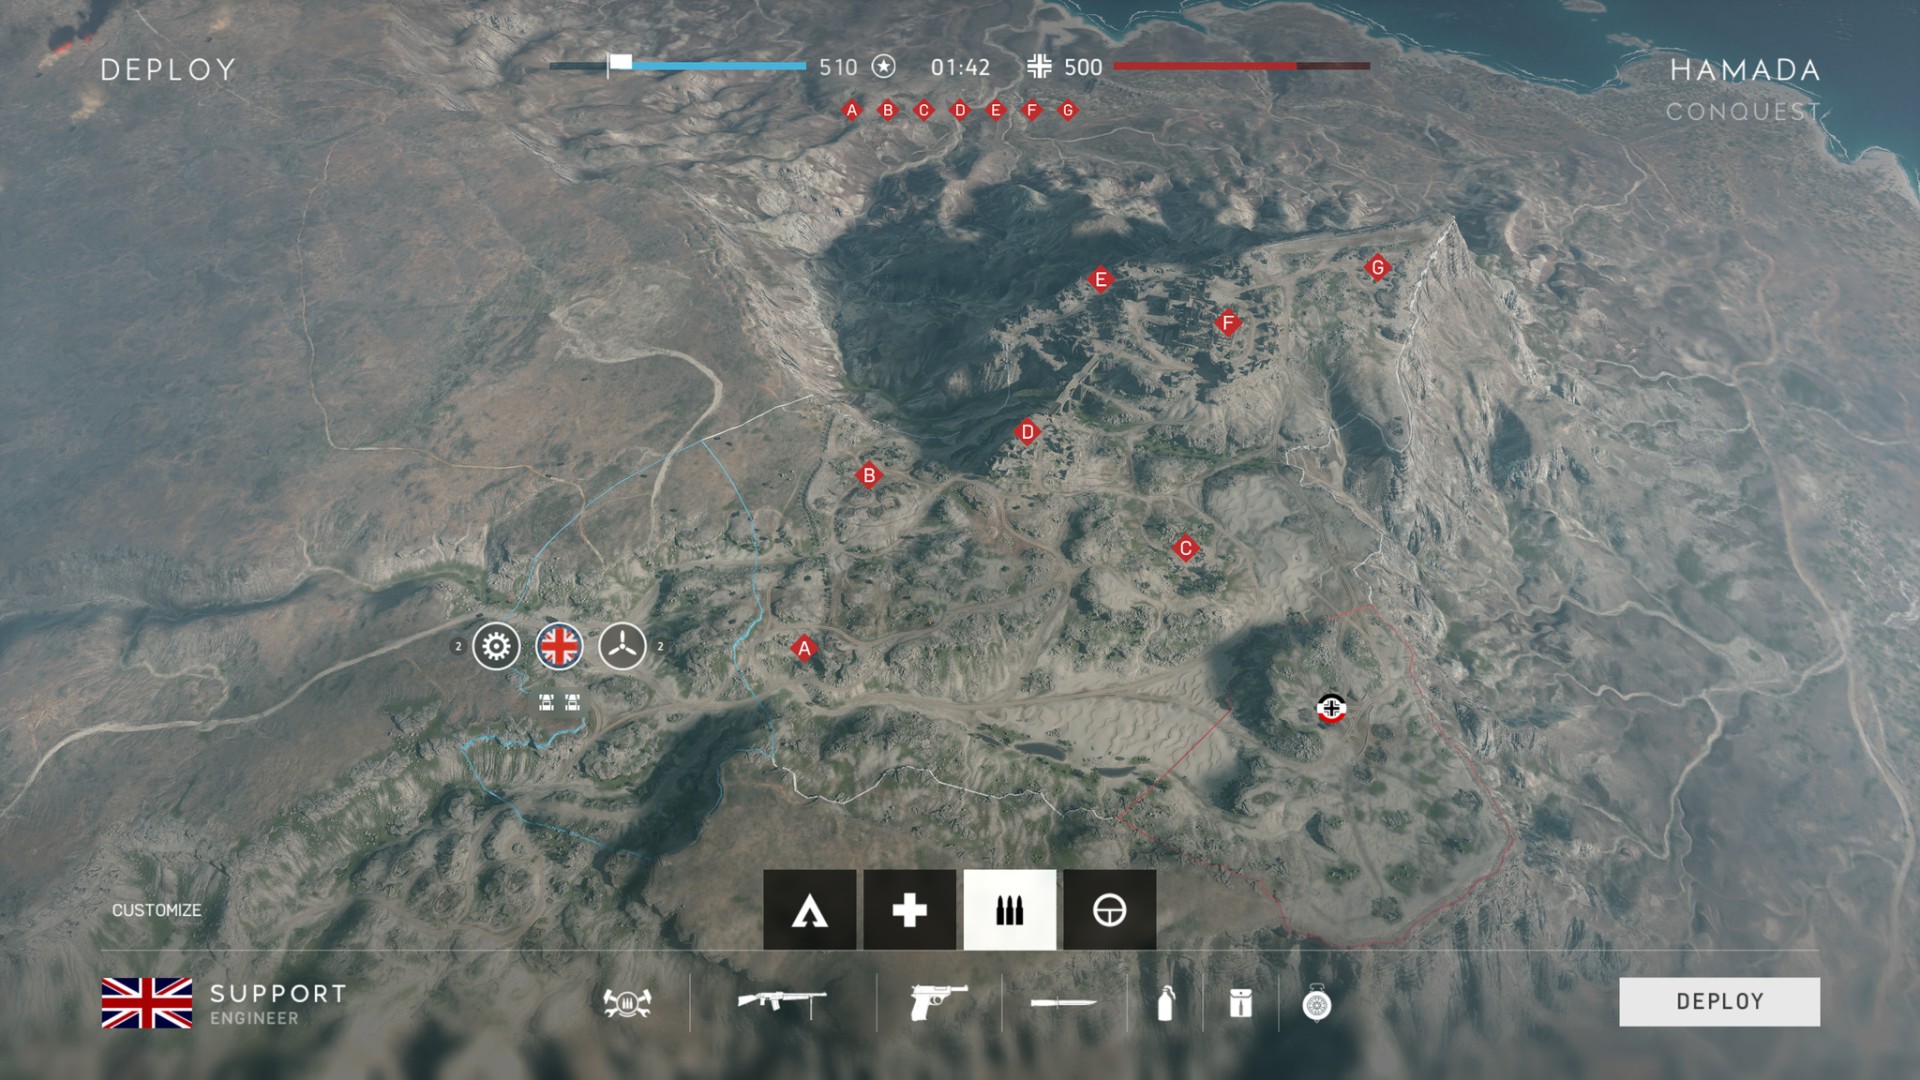
Seven Capture Points
On this map, there are even more flags — be prepared by learning more about each. Surrounded by low cliffs and very little cover is the Ridge Nest and Flag A. Close to Allied HQ, this point can be held, even against vehicle attack, with sufficient Fortifications and making use of nearby Supply Stations. Flag B is the Artillery Camp, a multi-level area with elevations perfect for infantry defensive positions.
The Oasis at Flag C is difficult to access via vehicle and provides plenty of cover and high ground for infantry attacks. Flag D can be found at the Bridge Camp and is an essential position for taking (and holding) the bridge to the ruins. It also grants your team an extra tank. Flag E can be found at the Desert Ruins, with enough standing architecture remaining to make anyone in a vehicle think twice about approaching. If you’re looking for a great place to ambush the enemy, these ruins are ideal.
Flag F is the Temple, an ancient place of worship now a deadly trap for both vehicles and infantry alike. If we had a single piece of advice for this point it’s “Look up.” Finally, Flag G is located at the Peak Camp. This Axis stronghold features its own airstrip and offers those who can hold it an extra aircraft.
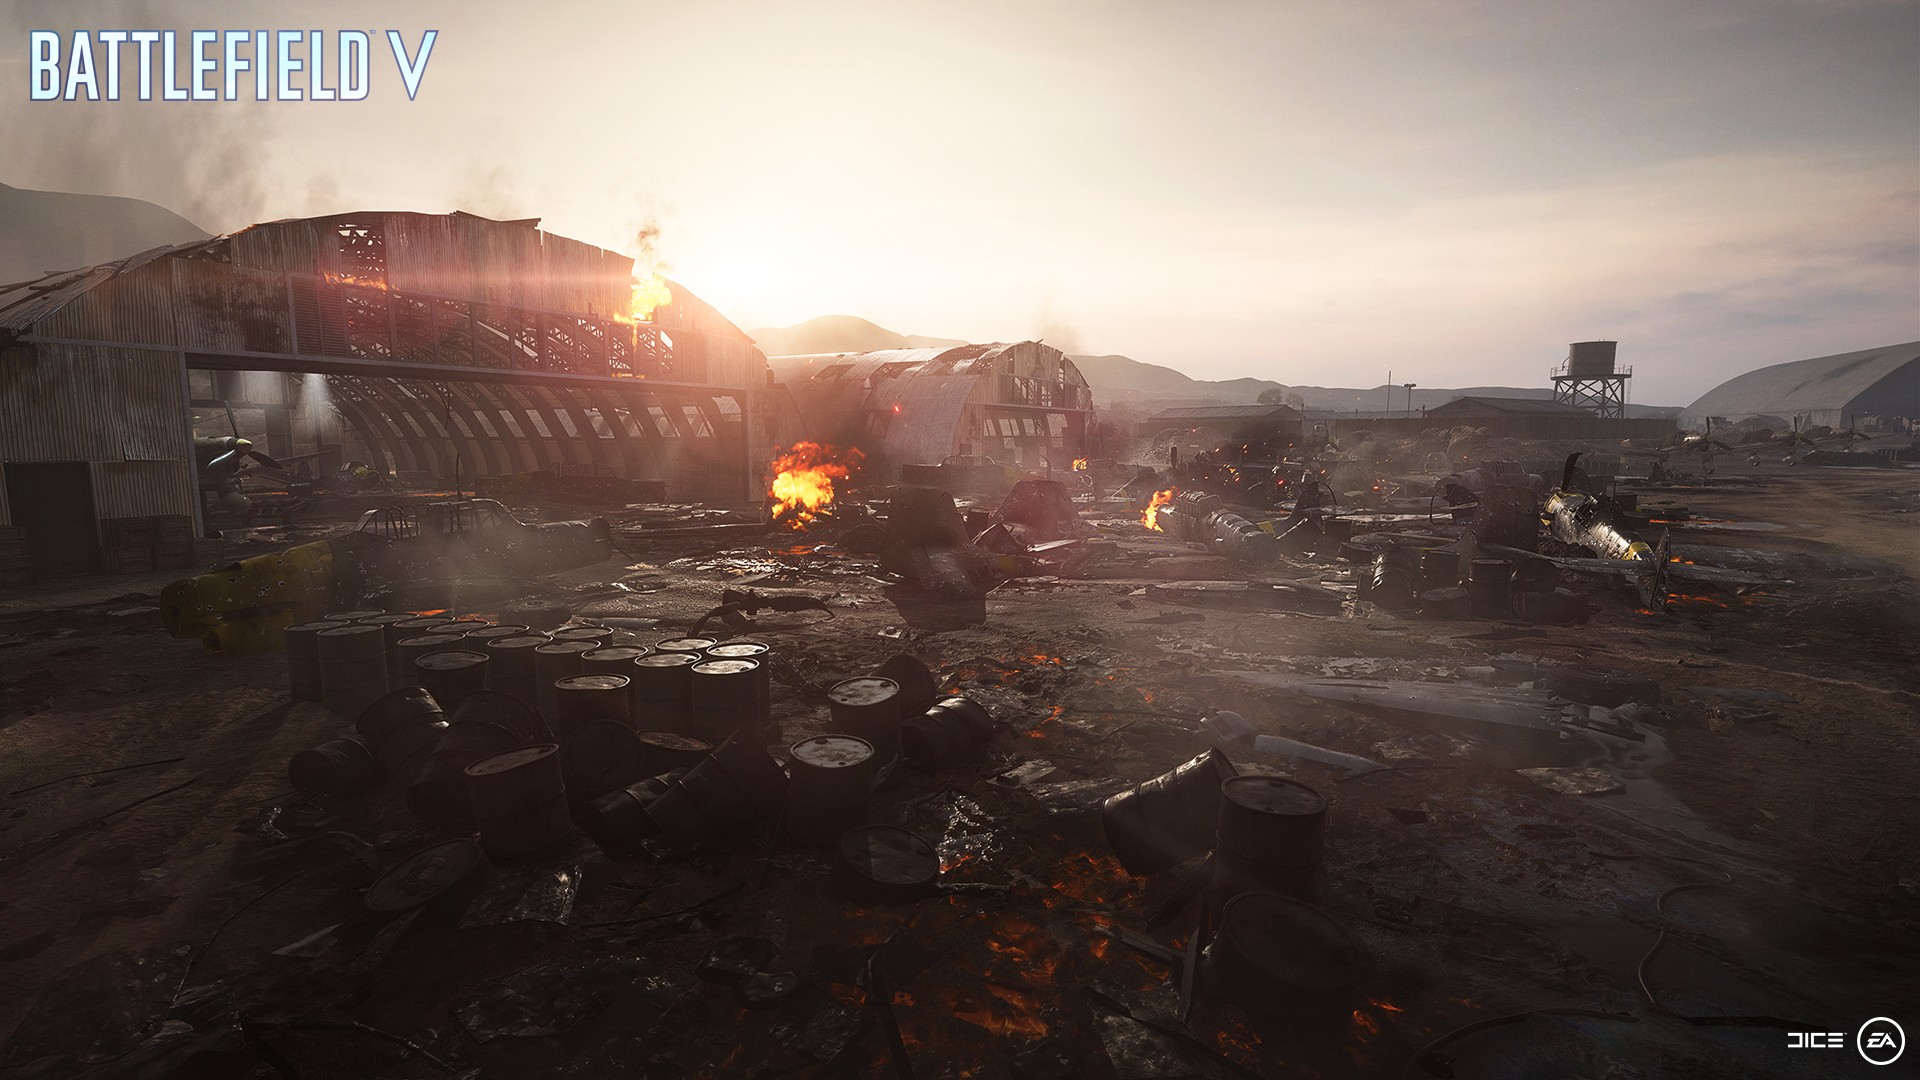
Welcome to Aerodrome
The second map, Aerodrome features the smoldering remains of an Axis airfield and hanger in the vast wastes of the North African desert. Smoke and wind-blown sand hang heavily over an area now littered with crates, abandoned vehicles, and aircraft. Not as large or sprawling as Hamada, this map is more condensed and fiercely contested. You won’t have to travel far to find your next fight on Aerodrome.
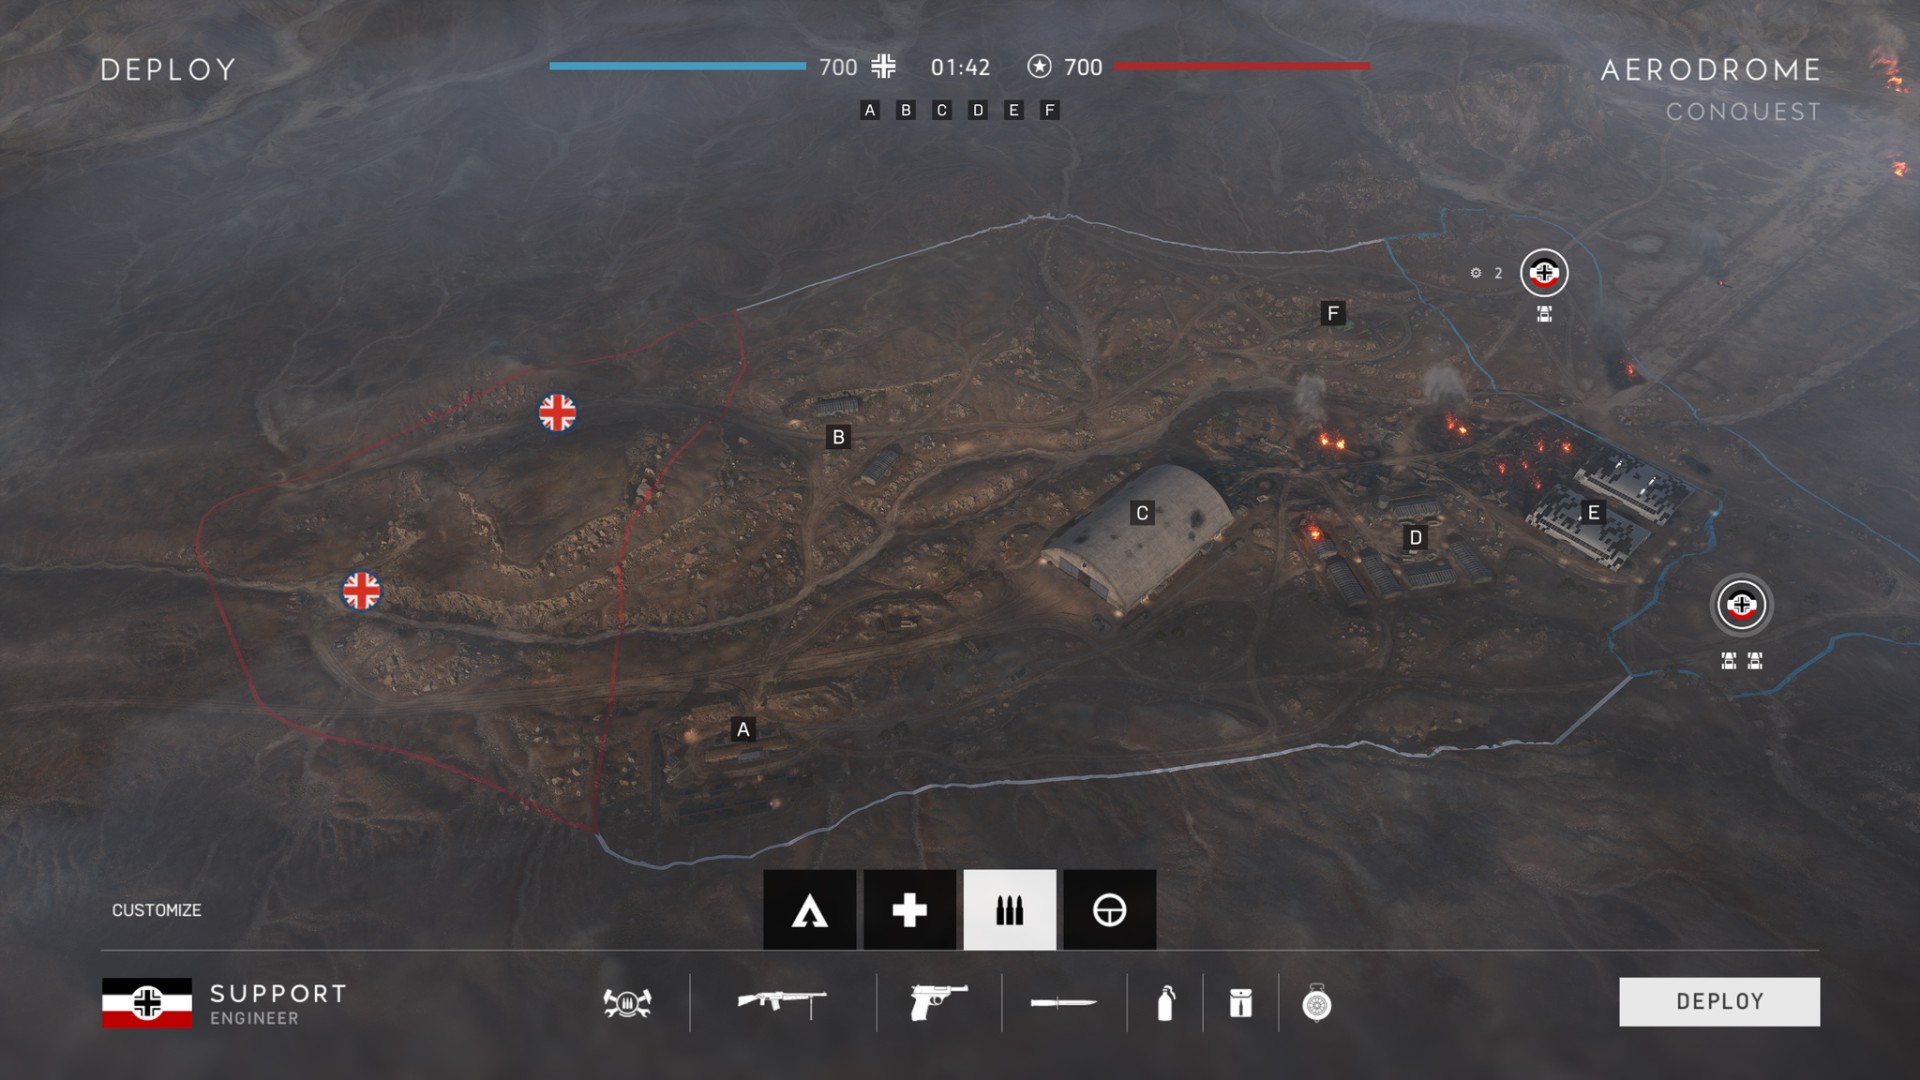
Six Capture Points
Let’s jump into the areas you’ll need to take and hold on this map. We’ll start with Flag A, the Depot, where Allied forces will generally begin their attacks. Taking this flag gives you access to an incredible vantage spot atop the tower, with great views of many other capture points. Flag B, the Checkpoint, offers players some actual high ground on the Overlook, and a great place to dig in with a trench by the eastern barracks.
Flag C consists of the Aerodrome itself. The centrally-located hangar, filled with Stuka and Ju 88 fighters, is going to be very popular with both teams. Hold it and you’ll have an extremely handy spawn point for future incursions. The Barracks at Flag D is a great place to stage attacks on several nearby capture points or fix up your tank at the handy Vehicle Supply Station.
Flag E is located at the Hangars and is close to the Axis HQ. Already heavily hit by Allied bombing runs, this area is littered with debris, but offers plenty of cover. Flag F is the Radar tower, located on one of the most elevated points on the map. While exposed to snipers from the Overlook, the ridge and Radar tower offer you more than a fighting chance.
Remember, Battlefield V is still in development and all game features may be subject to change. Battlefield V is now available for pre-order on the Microsoft Store. Stay tuned to Xbox Wire for the latest news and information for all things Xbox.